

The first new regulation 18-Hole golf course in Minnesota in more than a decade on the site of the existing 27-Hole Golf Course. The new design has wider fairways with minimal number of hazards to create strategic options for all talent levels.
Course Scorecard & Layout

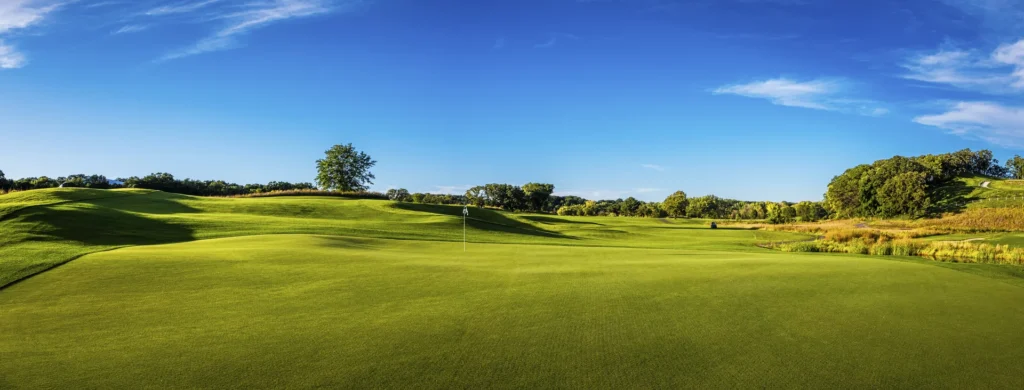
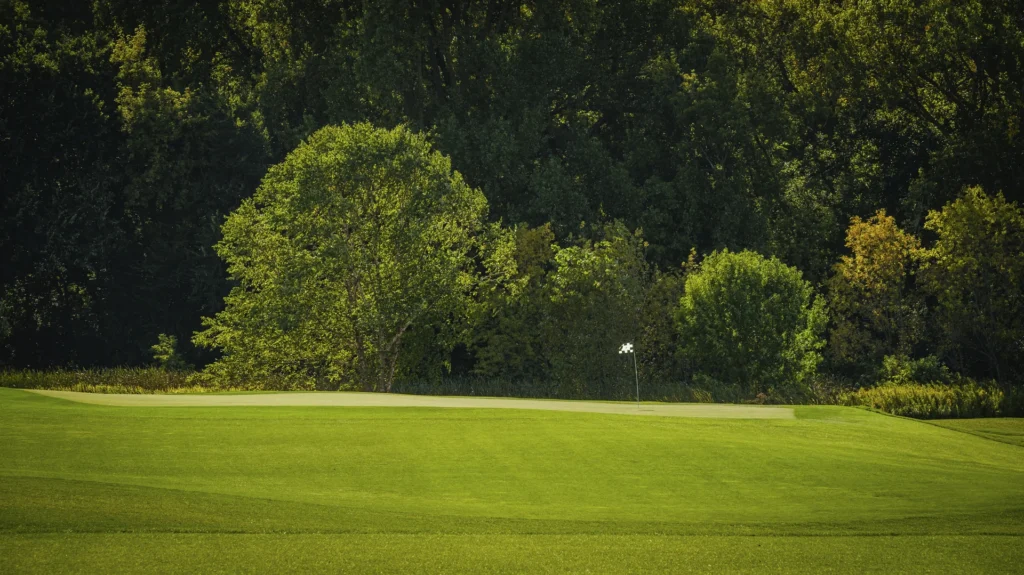
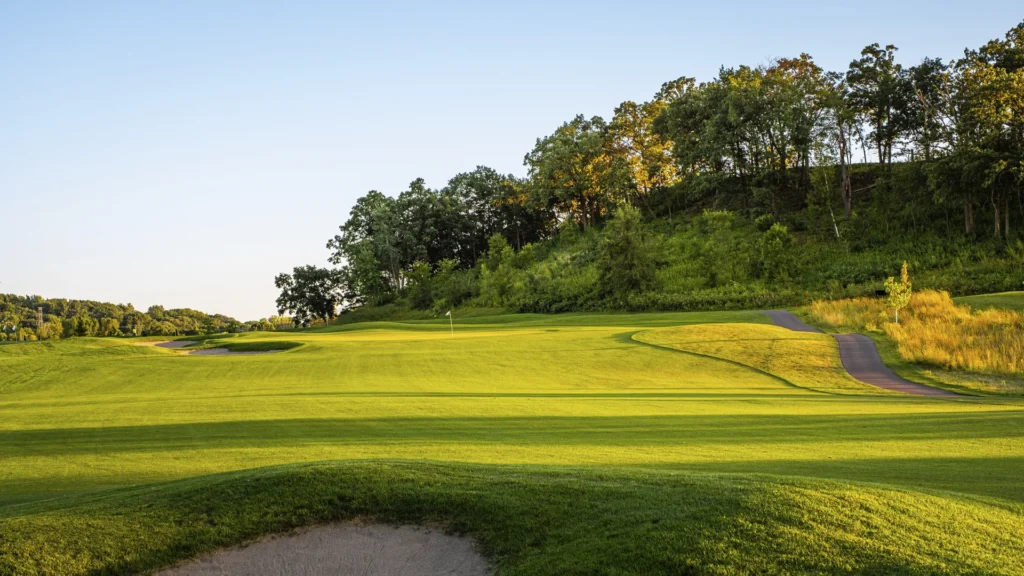
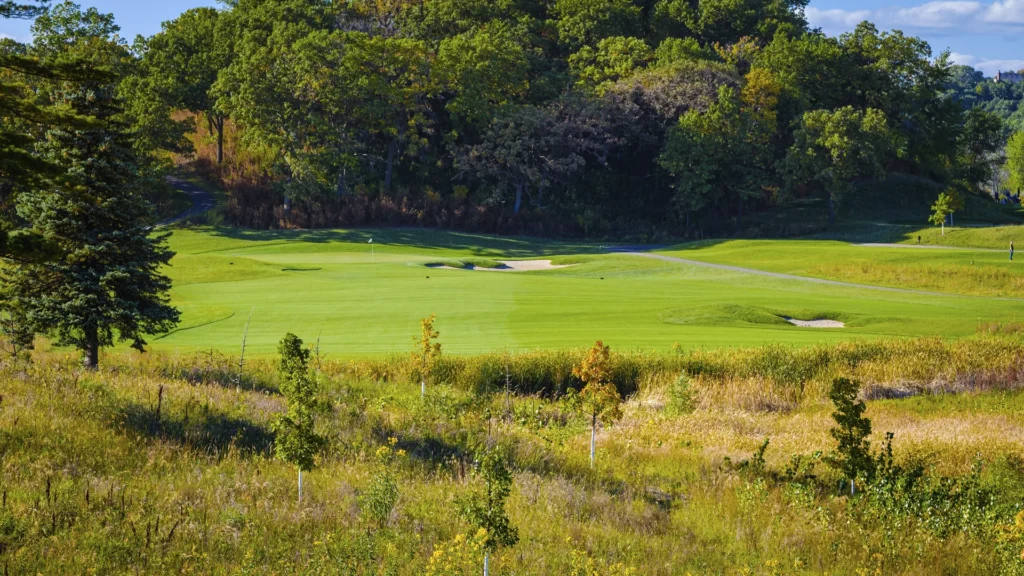
Hole 1
Par 4 | 236–369 yards
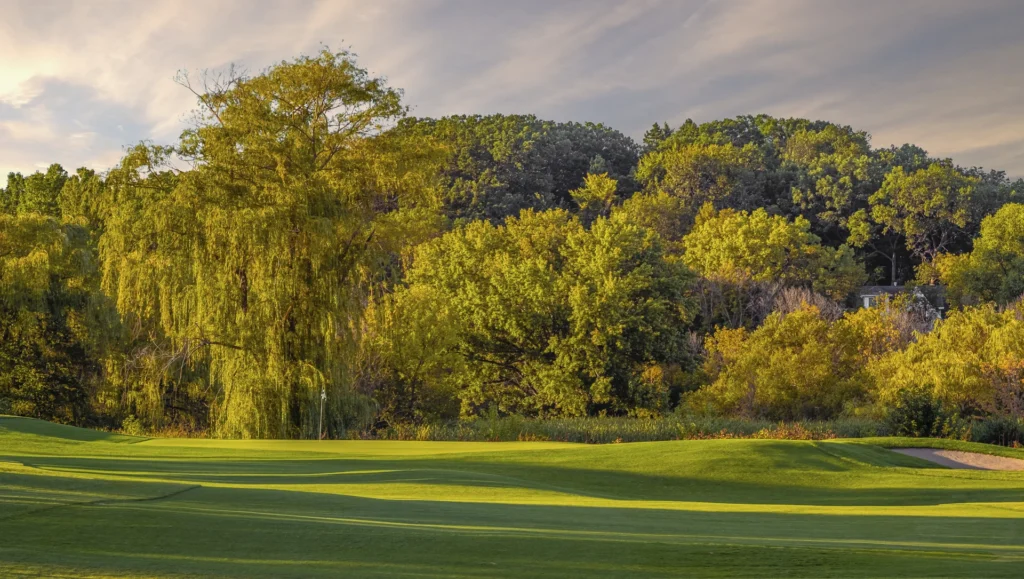
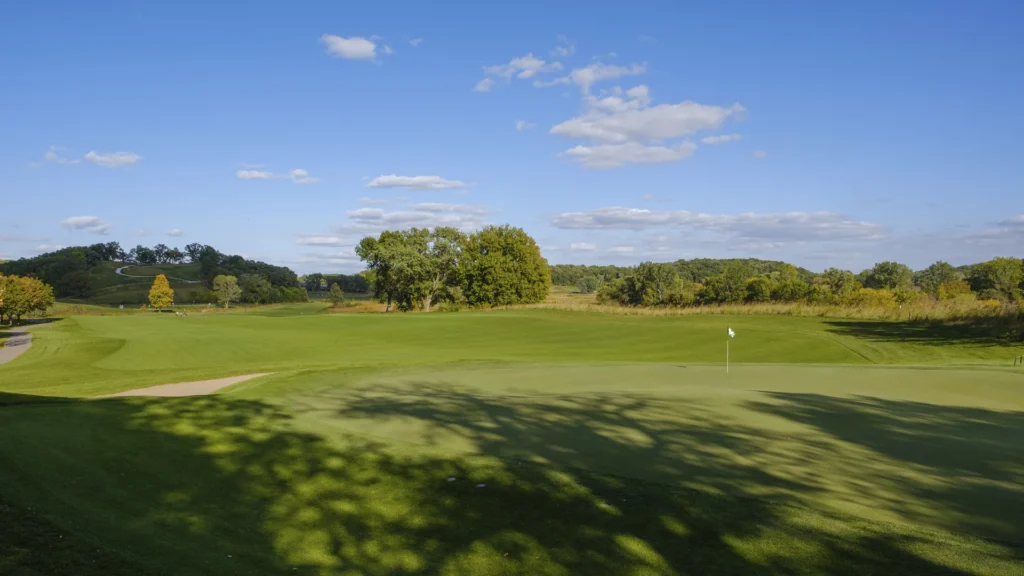
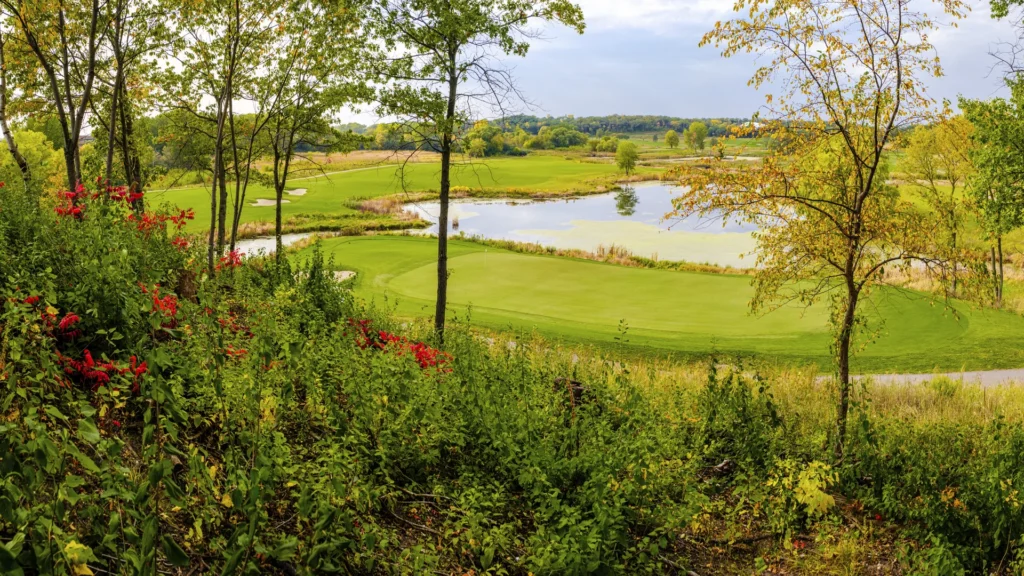
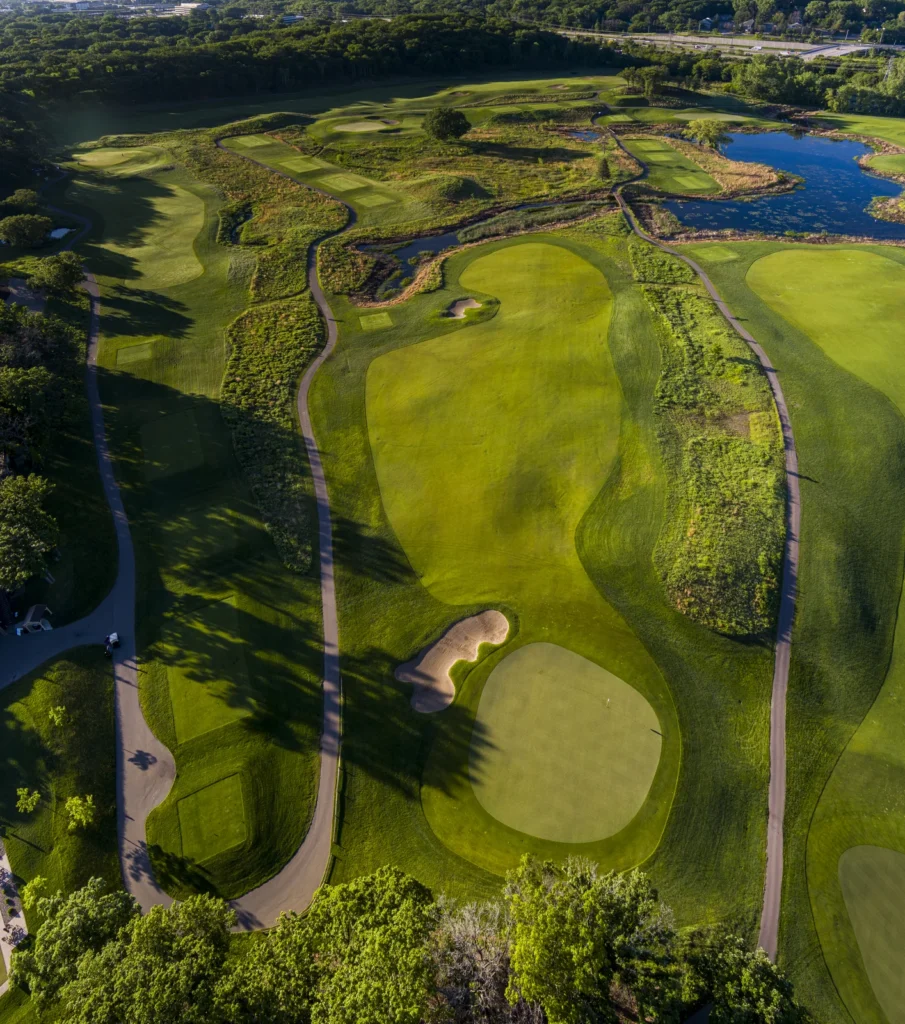
The opening hole begins from an elevated tee tucked into a hillside, providing the golfer with a complete view of the starting hole as well as several surrounding holes. The rumpled fairway leads golfers toward a green pinched by two mounds, both of which bleed into the putting surface and serve as the transition between two tiers.
In a nod to simple greens of a century ago, the approach seamlessly dissipates into the putting surface. The simplicity ends on the green, though, as a precise approach is necessary for anyone seeking a short putt.
Yardages
| Tee | Yardage |
|---|---|
| Championship | 369 |
| E | 340 |
| D | 312 |
| I | 281 |
| N | 269 |
| A | 236 |
Playing Tip
The most challenging pin placement is the lower front-right quadrant, which is tucked behind a lone sand bunker and pinched on the right from that side’s mound.
Hole 2
Par 4 | 280–417 yards
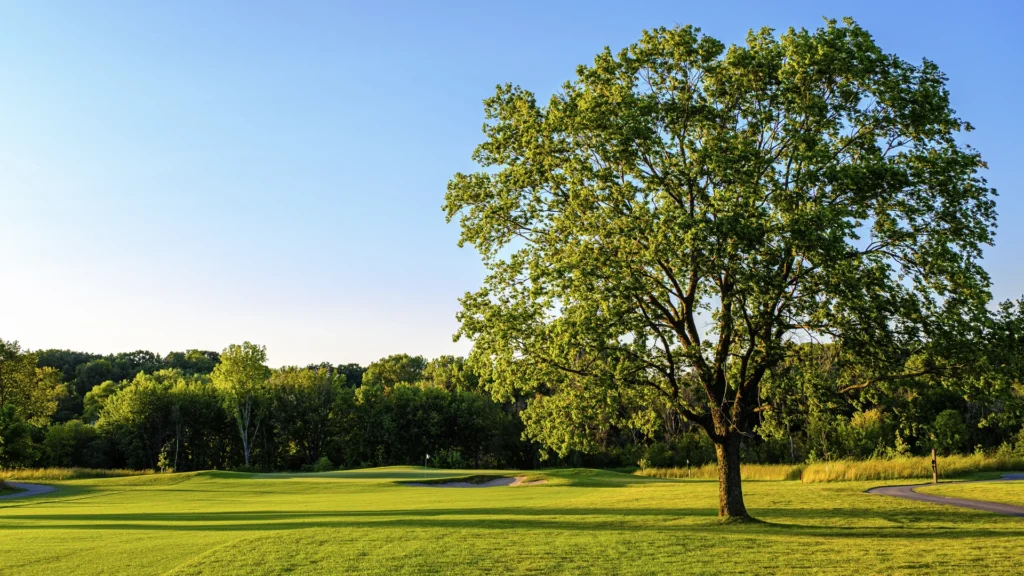
This dogleg right par 4 doesn’t require a long tee shot as much as it requires an aggressive tee shot willing to hug a creek running along the right side from the tee complex, extending the length of the fairway before it bisects the fairway just beyond the landing area.
An approach from the right side as close to the creek as possible can mean a two- or three-club difference from another rumpled fairway compared to an even longer tee shot that strays to the left away from the water. Any thoughts of cutting the corner off the tee will quickly be dropped as a huge oak stands sentinel at the corner of the dogleg on the green side of the creek.
Yardages
| Tee | Yardage |
|---|---|
| Championship | 417 |
| E | 393 |
| D | 365 |
| I | 323 |
| N | 313 |
| A | 280 |
Playing Tip
Any short approaches will find grass hollows that may kick balls to the left toward the same creek that now hugs the left side of the approach and putting surface.


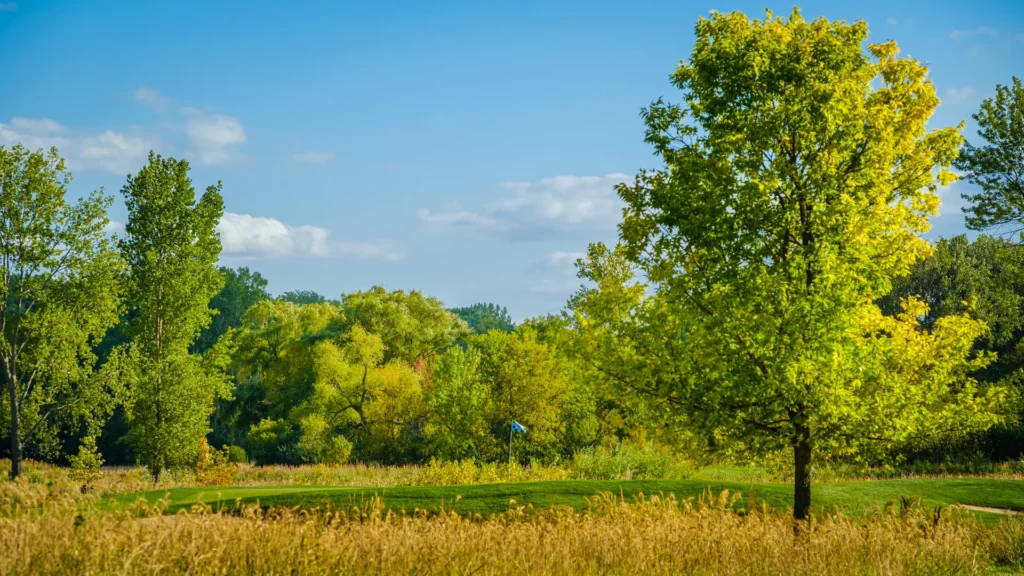
Hole 3
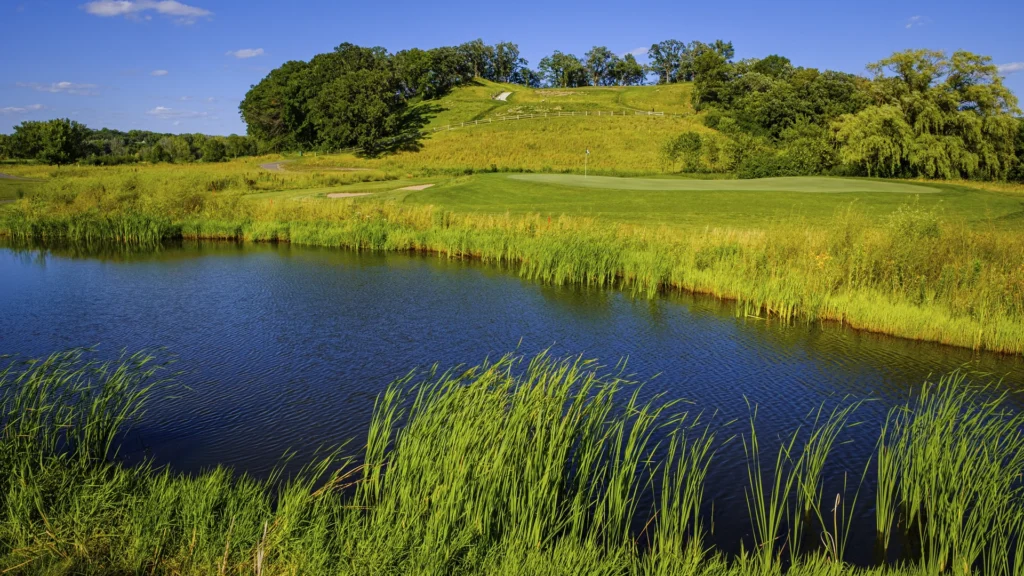
Par 3 | 115–162 yards
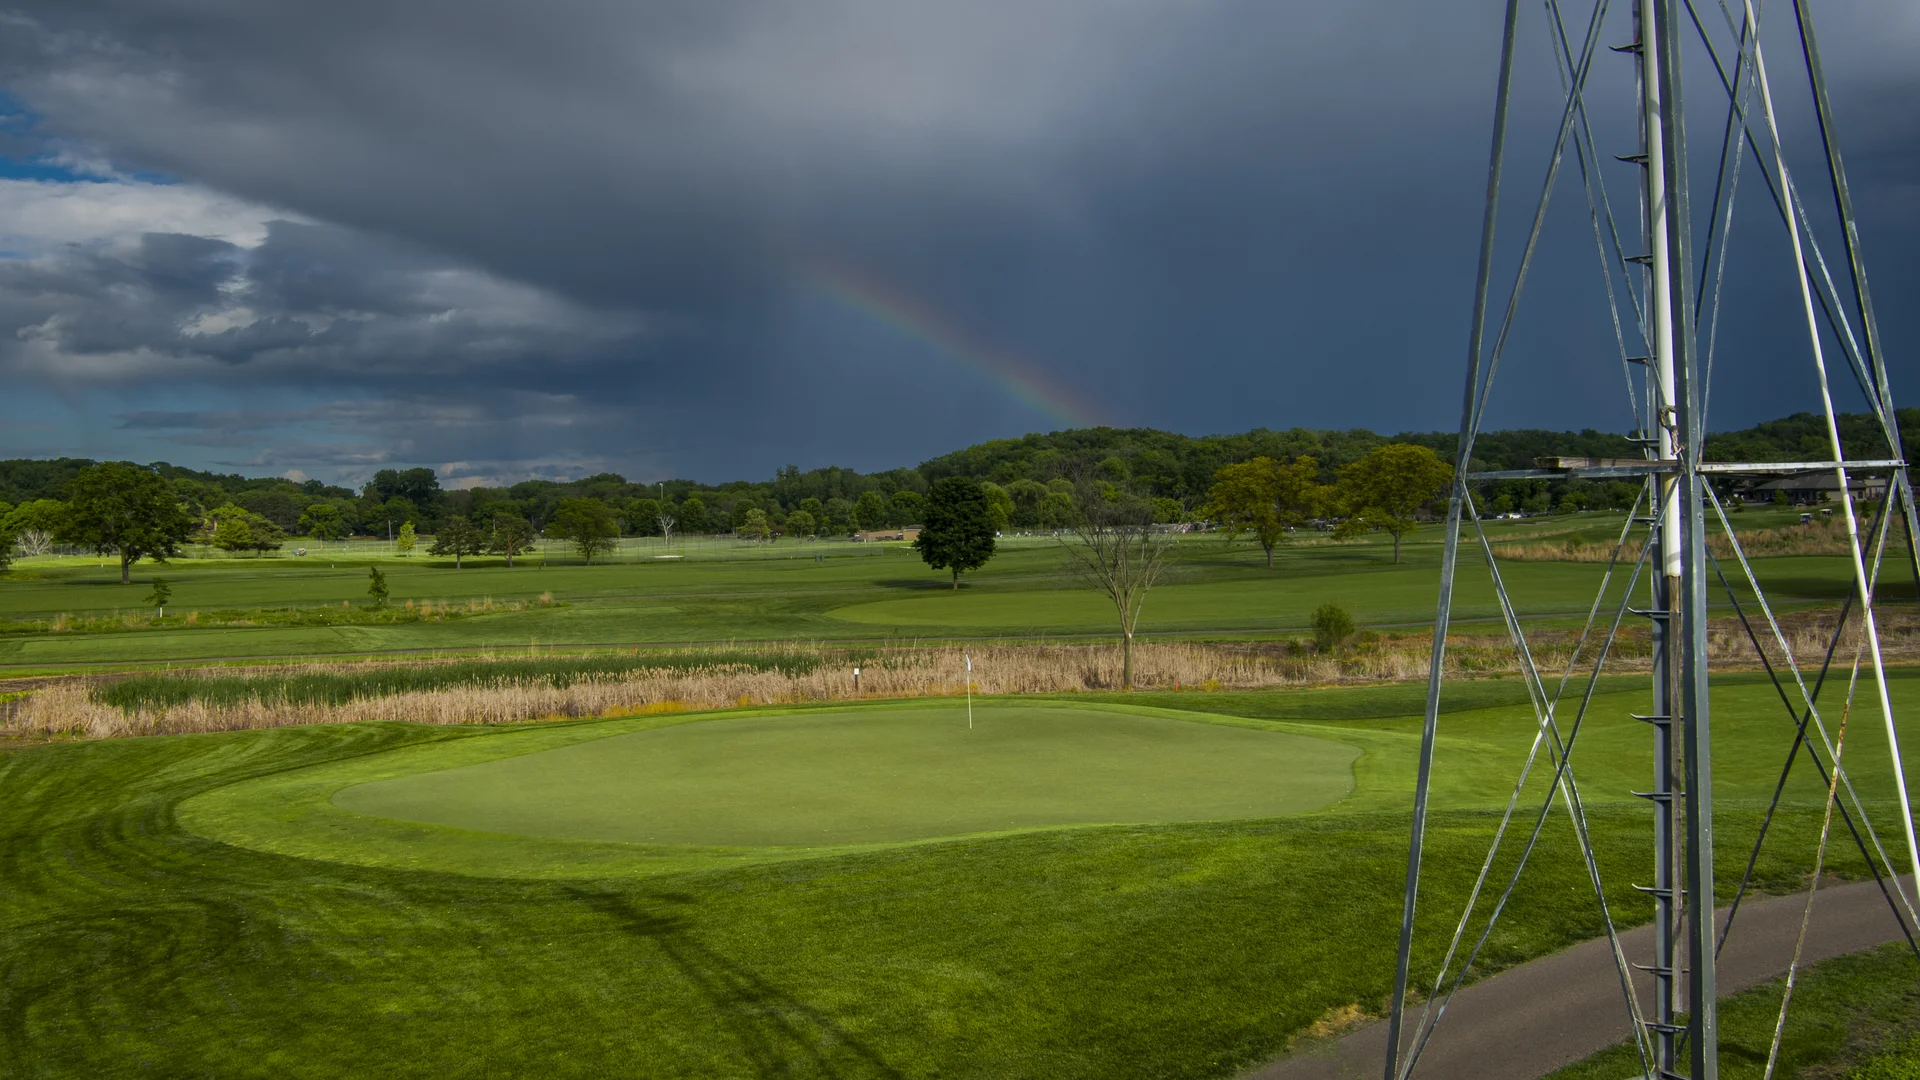
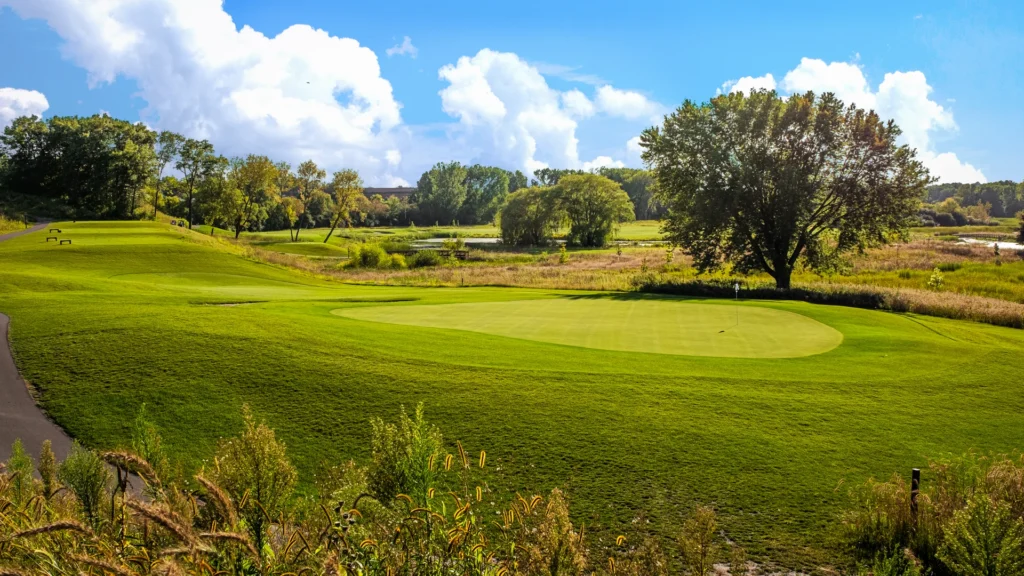
The first of three front-nine par 3 holes, No. 3’s green sits in front of a pond and is tucked into a modest ridge from the left side. As the ridge enters the putting surface, it separates the front left from the back right, creating specific targets for those yearning for birdie off the tees, depending on the pin placement of the day.
Yardages
| Tee | Yardage |
|---|---|
| Championship | 162 |
| E | 154 |
| D | 144 |
| I | 130 |
| N | 123 |
| A | 115 |
Playing Tip
The strategic feature that distinguishes this hole is a mound that extends out of the ridge along the left into the putting surface. Local knowledge will quickly develop as to the benefit in using the mound to kick a tee shot onto the putting surface from that side. Also known as the “member’s bounce”, the path of the tee shot off this feature is a shot maker’s opportunity to utilize the lay of the land to direct a tee shot toward the target.
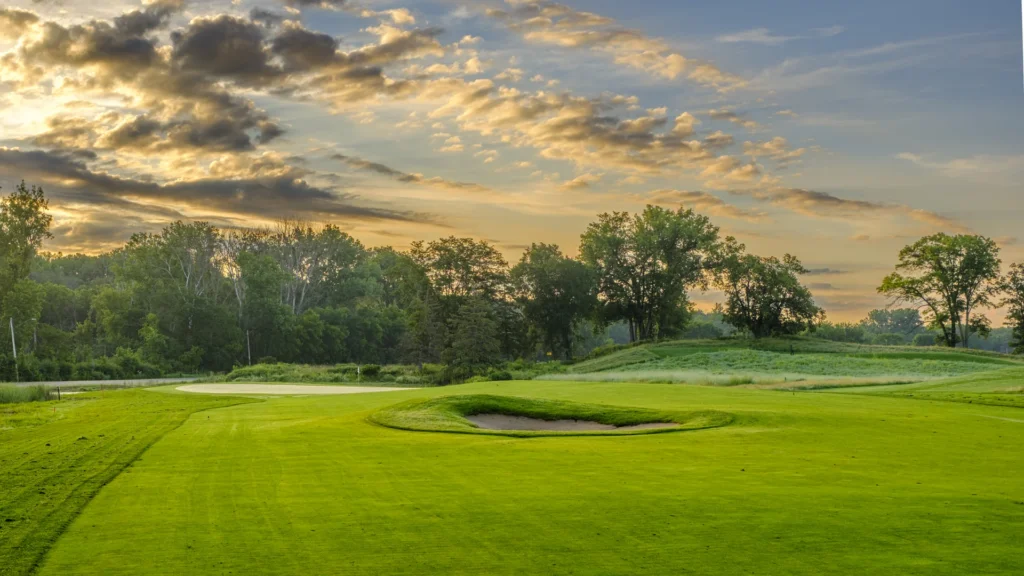
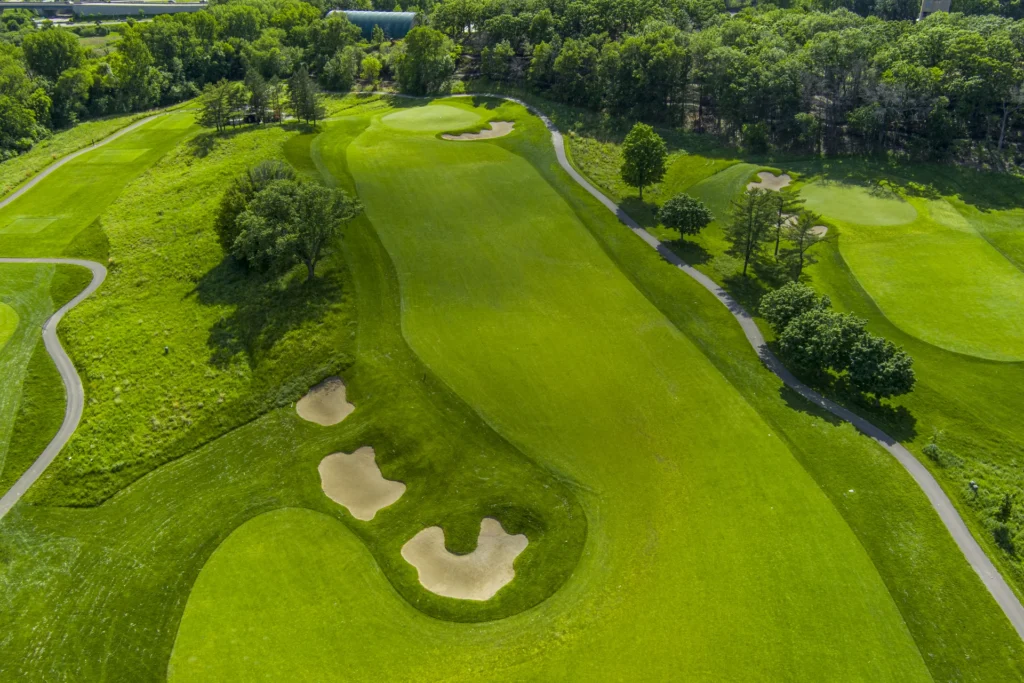
Hole 4
Par 5 | 331–515 yards
The first of three par 5s on the front nine, the fourth hole is also the first of the split-fairway holes. Starting from the ridge that also serves the third green, the tee shot hugs a grove of oaks to the right to a landing area that fades away from the golfer. Beyond the grove, the expansiveness of Braemar comes into view for the first time.
Yardages
| Tee | Yardage |
|---|---|
| Championship | 515 |
| E | 488 |
| D | 451 |
| I | 437 |
| N | 376 |
| A | 331 |
Playing Tip
One feature of the upper route is a chance for the better golfer to use the strong right-to-left slope to shape a wood or long-iron from right to left. Properly executed, the shot should kick on the down-slope and roll onto the putting surface from there.
Hole 5
Par 3 | 121–175 yards
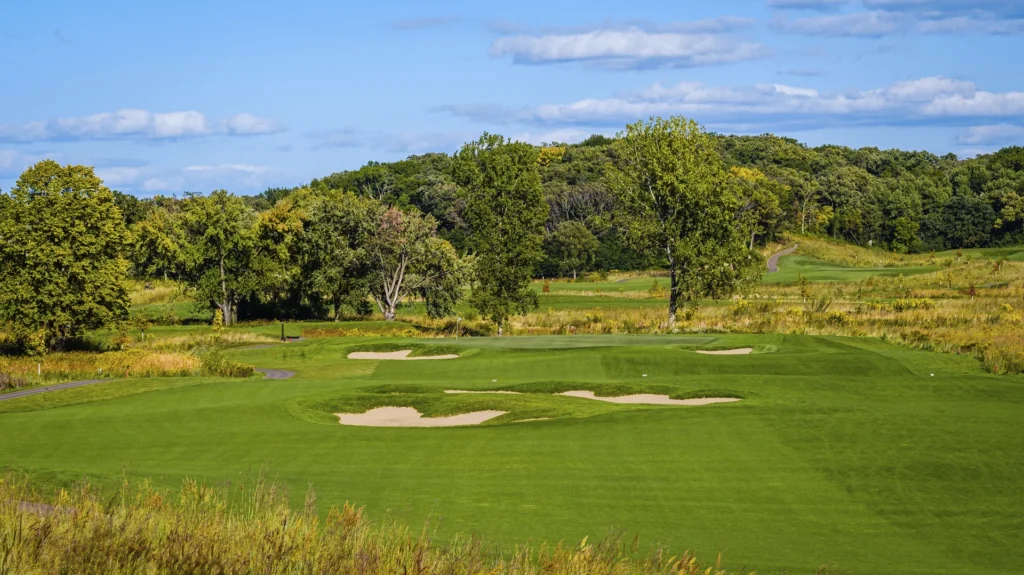
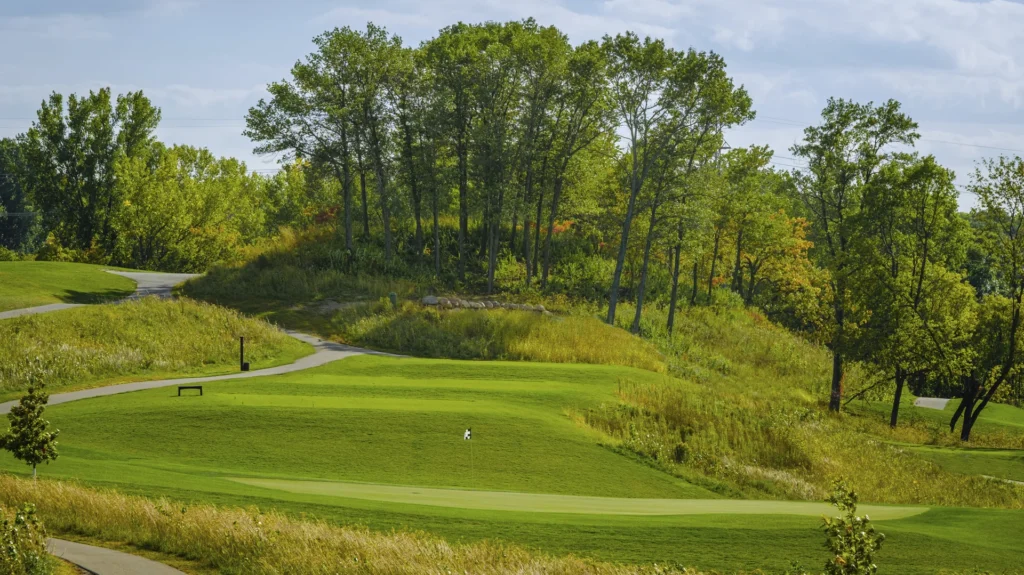
The second par 3 of the front nine plays uphill to a green set in the base of an oak savanna ridge line. The ridge buffers the entire west side of the golf course from eastward winds coming down from above. This bowl-like topography also creates a dramatic setting for the golfer facing a putting surface defined by three different tiers surrounded by three sand bunkers.
The green is partially concealed at its opening by a long ridge cutting across the line of play in front from the right, allowing a running approach entry to the putting surface if the ball isn’t flown all the way to the green.
Yardages
| Tee | Yardage |
|---|---|
| Championship | 175 |
| E | 164 |
| D | 159 |
| I | 153 |
| N | 135 |
| A | 121 |

Hole 6
Par 5 | 327–519 yards
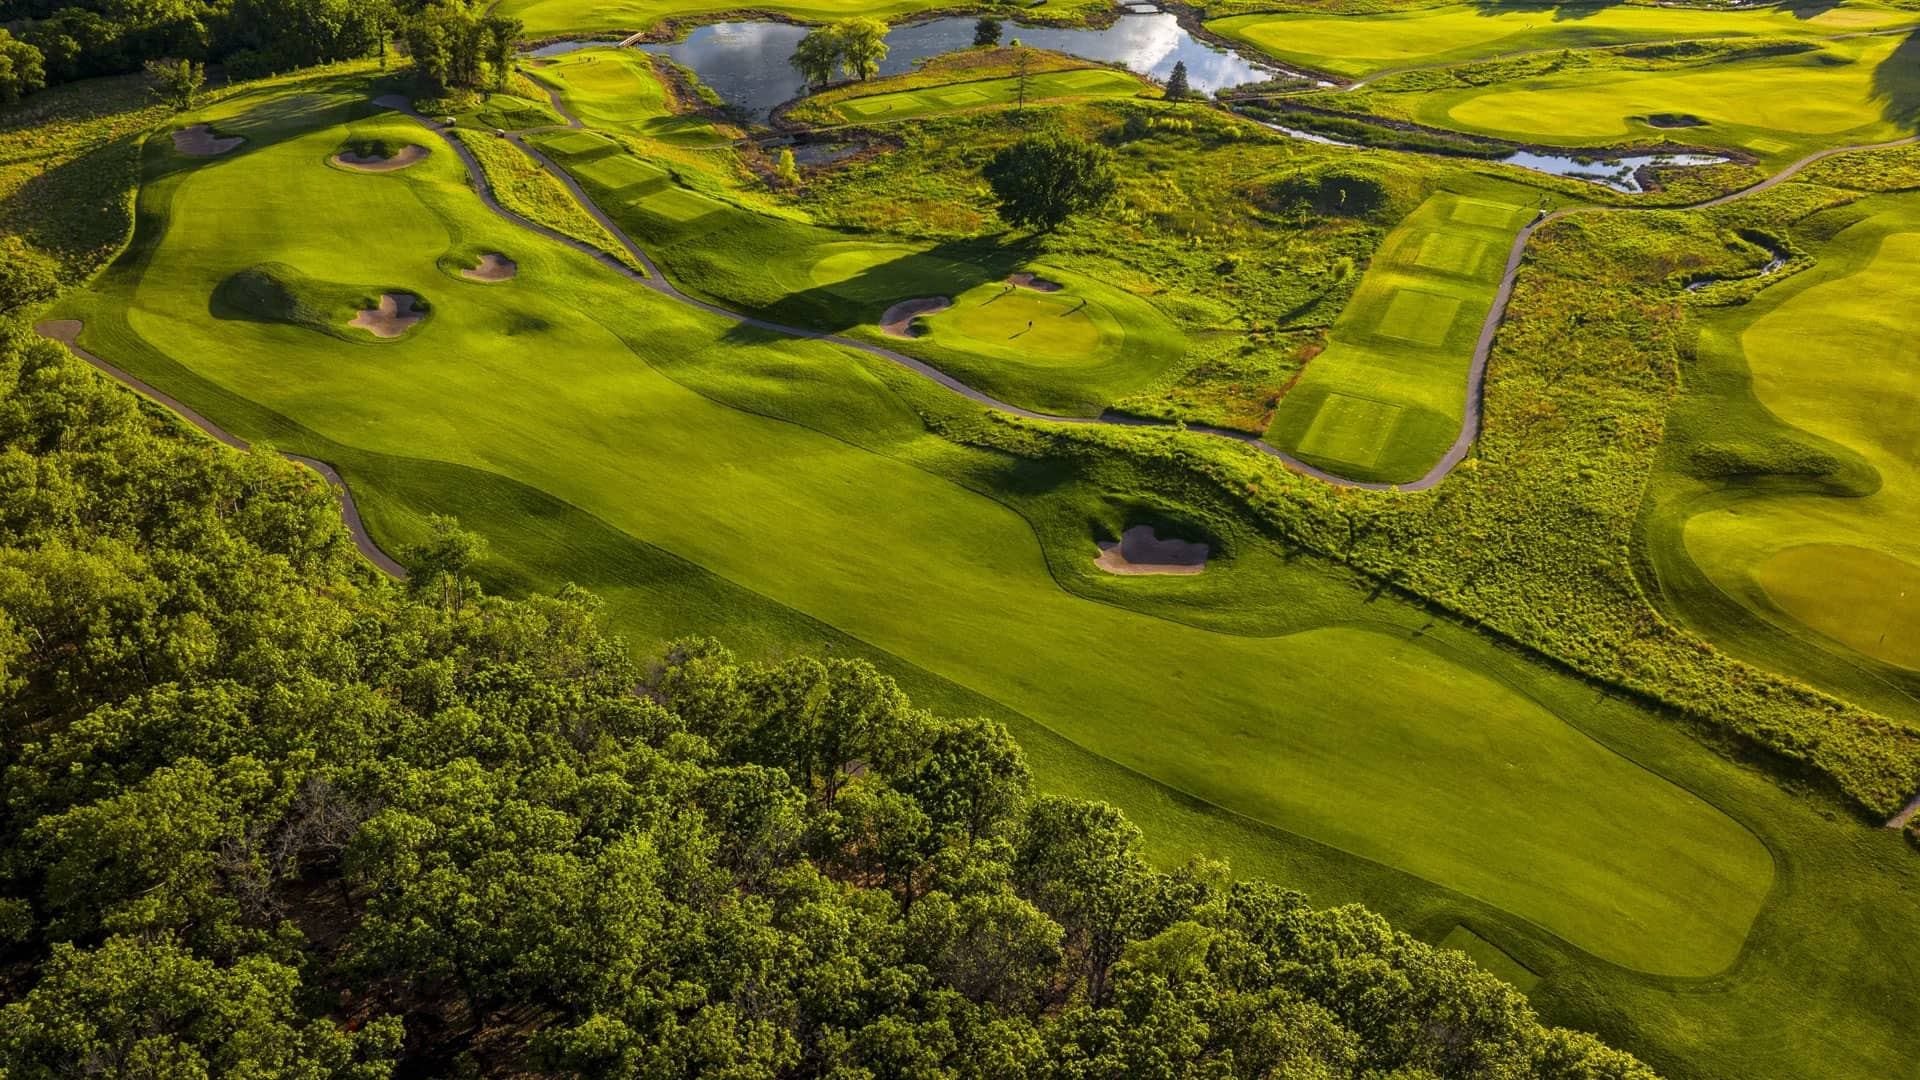
The second of the trio of front-nine par 5 holes moves to the left downhill from the oak savanna ridge into a valley framed by more oaks along the left and a hillside on the right.
The shorter route cutting the corner to the left requires a play over a swale running along that side. The next shot along this line to the green can best be described as uncomfortable as the route is blocked by that second fairway bunker in addition to more oaks matched on the right side by an additional tree line.
A third fairway bunker jutting out from another ridge on the right approximately 50 yards out conceals the right half of the putting surface. The line of play bisects the green with a dramatic ridge that transitions the high side of the green into the lower left side of the green.
Yardages
| Tee | Yardage |
|---|---|
| Championship | 519 |
| E | 493 |
| D | 458 |
| I | 448 |
| N | 438 |
| A | 327 |
Playing Tip
The golfer who assumes the fairway bunker cut into the base of that hillside should be avoided will miss a great aiming point off the tee. The play from as close to that fairway bunker as possible is the wiser choice as the route opens up from that side, eliminating a bunker further down the left side from consideration as well as both tree lines.

Hole 7
Par 3 | 100–174 yards
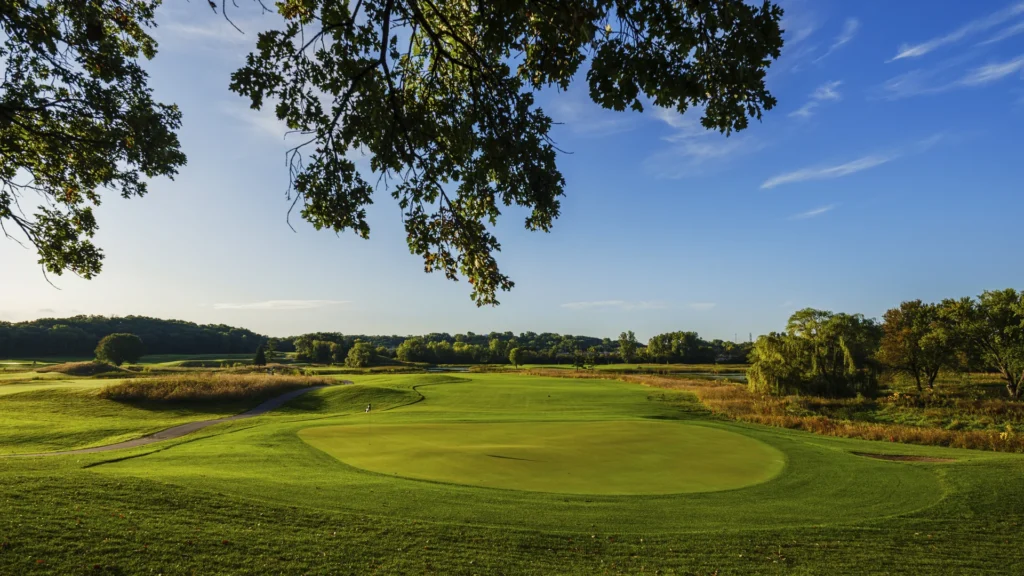
The final pairing of a trio of consecutive par 3/par 5s on the front nine begins with a long three from a tee box backed up to a pond. The entire putting surface is open in front and on the sides as a pair of bunkers keeps long shots out of the wetland behind the green.
The putting surface is a mirror image of the previous green with the high left half coming off a mound on that side then stepping down to a lower right side. A mound in front of the green extends into the putting surface as the bisecting ridge.
Yardages
| Tee | Yardage |
|---|---|
| Championship | 174 |
| E | 167 |
| D | 147 |
| I | 133 |
| N | 112 |
| A | 100 |
Playing Tip
The hole appears relatively flat, a cross-slope drops from left to right, which allowed the hole to build up the left side of the green and develop a mound at the front left corner of the green. A single ridge coming out of that mound bleeds into the putting surface. Some tee shots will kick onto the green similar to (but different) than the mound that works into the third green from the back left.
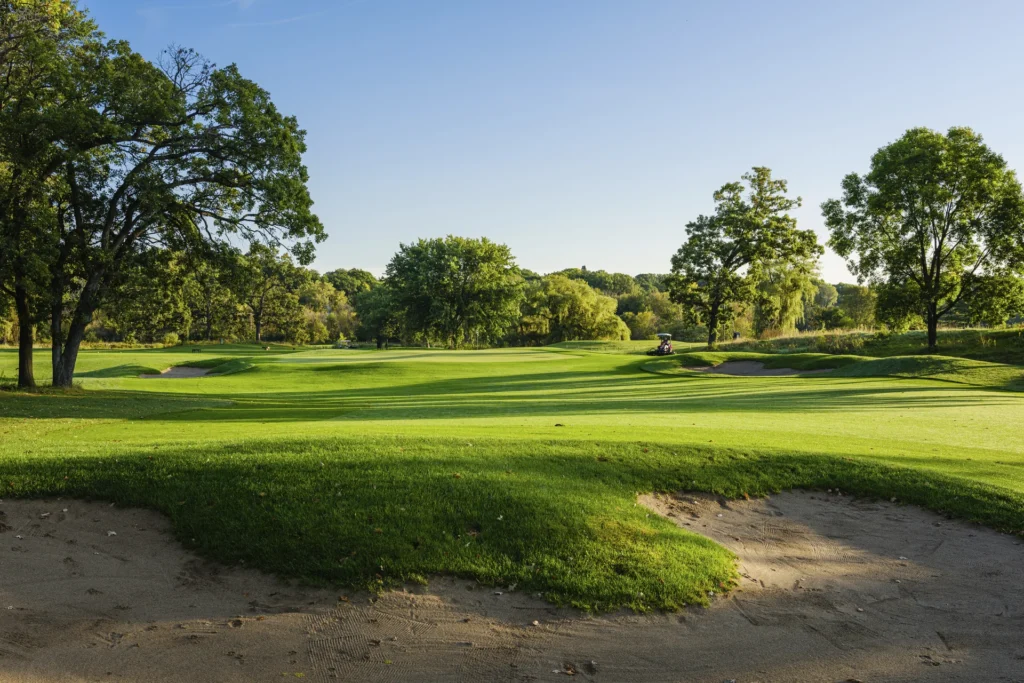
Hole 8
Par 5 | 351–515 yards
The last par 5 on the front nine weaves through a series of massive bur oaks bordering both sides of the hole along with wetlands and water. The tee shot must negotiate a grass hollow guarding the right side of the first landing area.
A fairway bunker slightly offset from the center of the second landing area blocks the more direct route to the green. If challenged, the green opens up to an approach of any length from the left side. Playing along the left keeps the wetlands at bay along that same side.
Yardages
| Tee | Yardage |
|---|---|
| Championship | 515 |
| E | 491 |
| D | 455 |
| I | 441 |
| N | 386 |
| A | 351 |
Playing Tip
The tee shot must negotiate a grass hollow guarding the right side of the first landing area. Those who carry the hollow will be rewarded with a direct second shot to a bunker-less green. Although the angle into the green from the right side is the preferred route, a ridge that begins about 15 yards out in the fairway bisects the landing area on that side before terminating inside the putting surface. Any approach leaking to the right may hit the right side of the ridge and tumble further away from the center of the fairway.
Hole 9
Par 4 | 258–402 yards
Within the overall routing of the new Championship 18, the ninth hole plays in the opposite direction of the old first hole. The advantage for the ninth hole results in less conflict with the adjacent driving range in the sense that any sliced tee shots will go back into the golf course and not into the range.
Originally, this hole did not have a fairway sand bunker but as the shaping of the hole progressed, it was clear that a bunker cut into the face of the rising fairway was a great opportunity to showcase the topography of the hole.
Yardages
| Tee | Yardage |
|---|---|
| Championship | 402 |
| E | 375 |
| D | 343 |
| I | 313 |
| N | 300 |
| A | 258 |
Playing Tip
Cut the corner with your tee shot over the fairway bunker on the left and have a shorter approach shot to an elevated green. This simple strategy requires negotiating a pair of bunkers protecting the left for the benefit of the more direct route. Out of bounds lurks along that left side, though, so golfers can play safe along the rolling fairway to the right of the bunker to avoid any undue penalty.
Hole 10
Par 4 | 240–382 yards
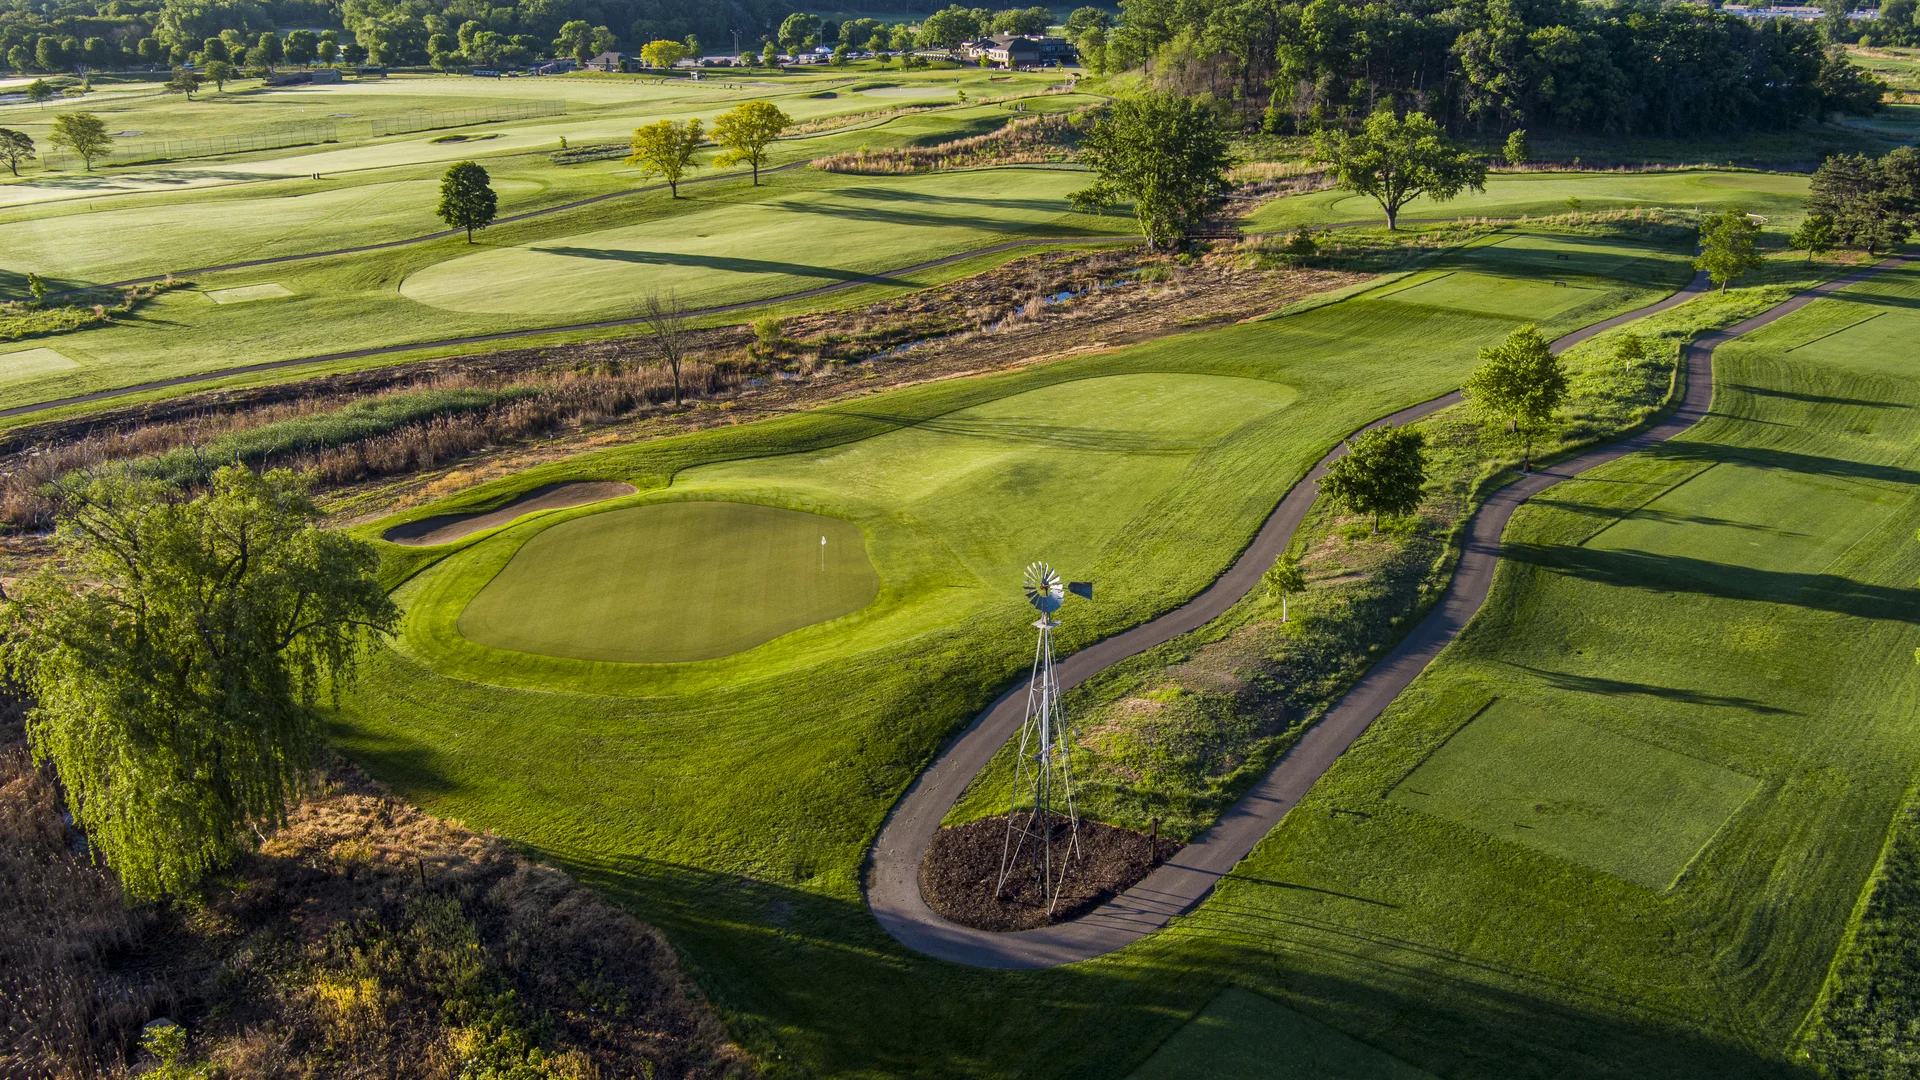
The straightaway par 4 10th hole also plays to an elevated green that seems accessible enough thanks to the absence of any surrounding sand. The tee shot seems equally innocuous other than a small wetland waiting to catch a slightly right shot. Although the green does not have any bunkers, a large mound on the front right of the approach extends into the putting surface, blocking easy access for a low running approach.
The standout feature of this hole is a singular hillock that bisects the putting surface profile from the fairway. Granted, in this day and age of target golf, the hazard can be avoided by air for most golfers. Visually, though, it is another story. Coupled with a subtle ridge line running diagonally from left to right across the landing area, the hillock demands precise placement of one’s tee shot if a full view of the green on the approach is the goal.
Yardages
| Tee | Yardage |
|---|---|
| Championship | 382 |
| E | 355 |
| D | 323 |
| I | 300 |
| N | 287 |
| A | 240 |
Playing Tip
The further tee plays to the right, the more the green is screened from view by the hillock, it almost forces a blind approach. The desired tee shot is to the narrow left portion of the fairway, bringing rough and water into play for those who leak too far in that direction. The hillock and grass hollows in front, to the right, and behind the green are the primary hazards on this hole, along with a ridge bisecting the green from the left-side wood line. The result is the challenge of tee placement and utilizing the ground contours with an approach, rather than just the avoidance of sand.

Hole 11
Par 5 | 358–567 yards
The par 5 11th hole can only be described as a lot of golf hole. Traversing the entire eastern border of the golf course, the elevated tee shot plays over a valley. A sentinel mound to the right of the first landing area marks the most direct line to the green. Nestled into the base of it is the first of three fairway bunkers. Another rumpled fairway runs along the base of an oak savanna ridge along the left before splitting in two directions around a second ridge punctuated by a pair of bunkers cut into the base.
Strategically a mirror image of the par 5 fourth hole, the first par 5 of the back nine’s more direct line is the uphill fairway to the right. The left side is not as an abrupt route to the green, but one must cover more ground to get there in regulation (or sooner). Sand guards the green along that side as well. The green is a rolling exclamation point to this long dogleg-right. A ridge from the right bisects the front and back halves of the green.
Yardages
| Tee | Yardage |
|---|---|
| Championship | 567 |
| E | 537 |
| D | 509 |
| I | 435 |
| N | 398 |
| A | 358 |
Hole 12
Par 4 | 230–457 yards
One routing challenge with this site is working golf holes around existing ponds, the existing clubhouse location and the large hill in the middle of the property. Safety is a bit of a consideration, particularly with 12 and 18 playing parallel to each other in the same south-to-north direction from the landing areas into the greens. Both holes are dogleg-rights, which adds the predominant slice possibility as an additional safety challenge yet routing each hole.
Hole 12 exhibits a very non-intuitive approach to golf course design. The accepted rationale in the past leaves most every golfer who plays the game accepting that the center of the hole is always the route to take off the tee.
That is not the case for No. 12 at Braemar. In fact, the farther left one plays off the tees, the better the view and angle into the green becomes. So cutting the corner or even playing to the middle of the hole will leave the golfer with an absolute blind approach running against the slope of the fairway. The smart play is the longer route to the far left following a shallow valley with a full view of the putting surface. The strategic challenge of both holes results in golfers aiming to opposite sides on parallel holes (12 to the left and 18 to the right).
Yardages
| Tee | Yardage |
|---|---|
| Championship | 457 |
| E | 389 |
| D | 379 |
| I | 360 |
| N | 315 |
| A | 230 |

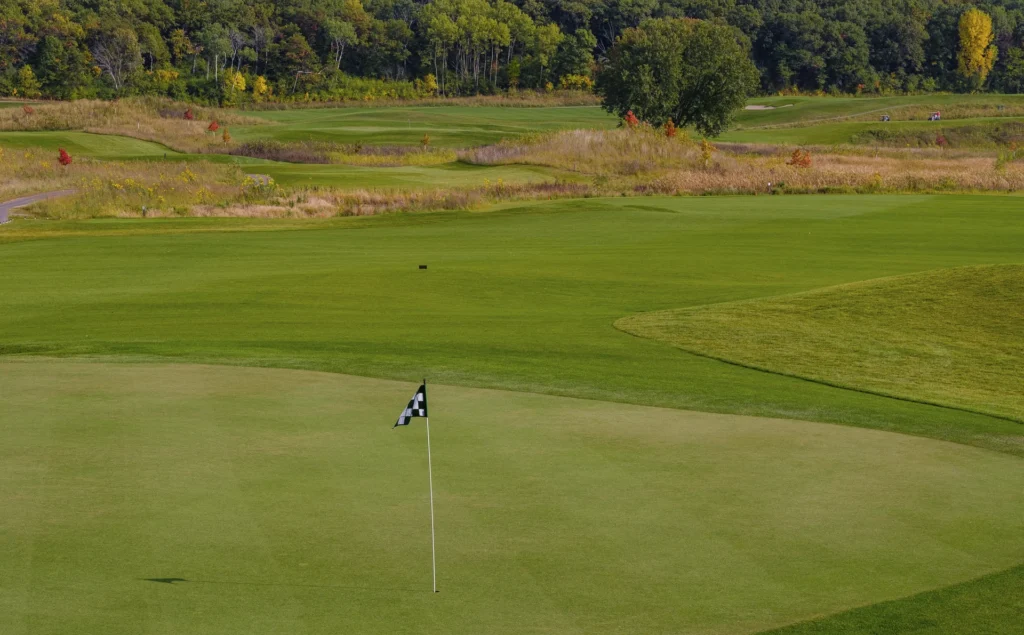
Hole 13
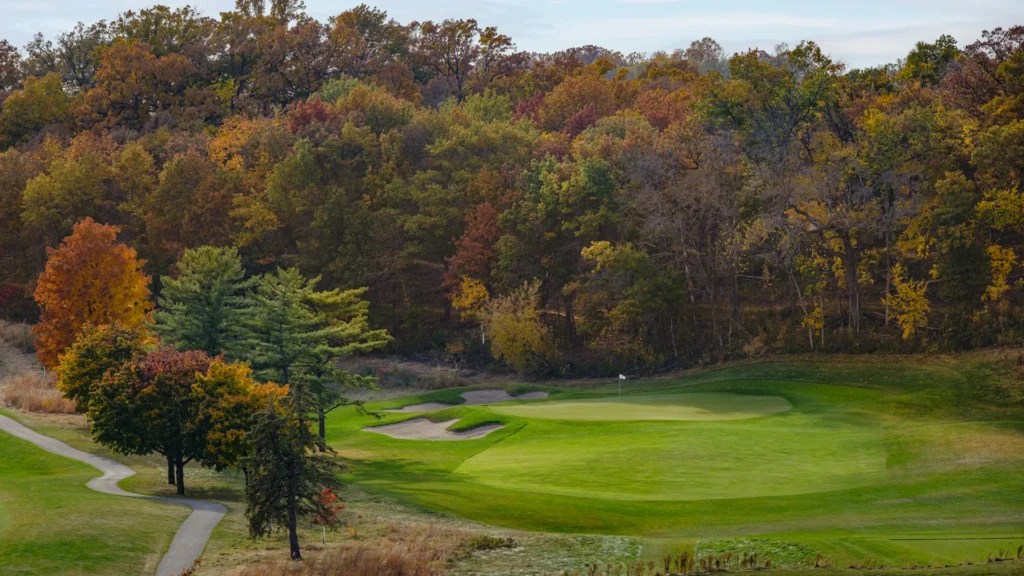
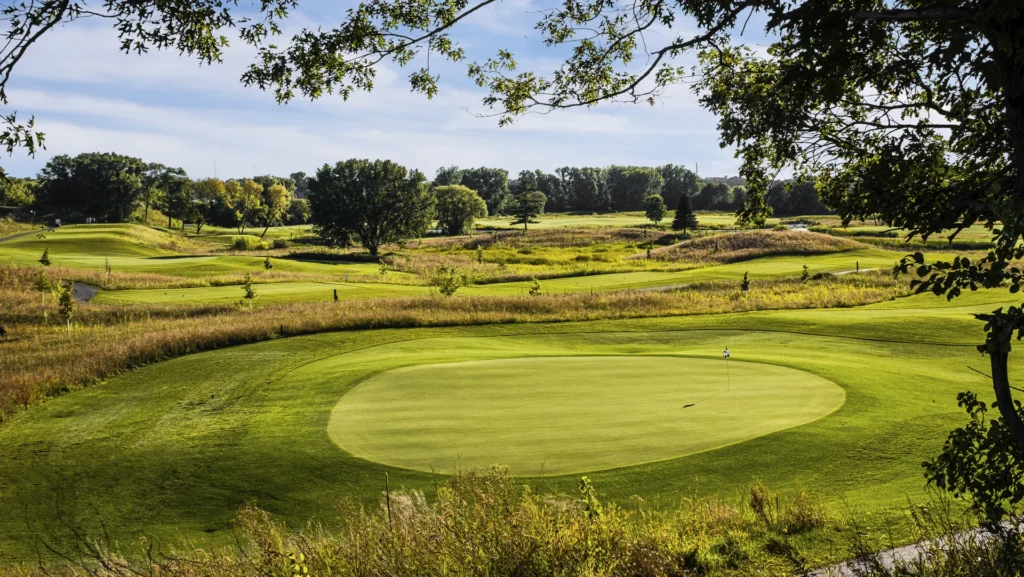
Par 3 | 133–204 yards
The original Braemar layout had a par 3 in this same spot that played downhill to a similar green location. It was a favorite memory of the locals.
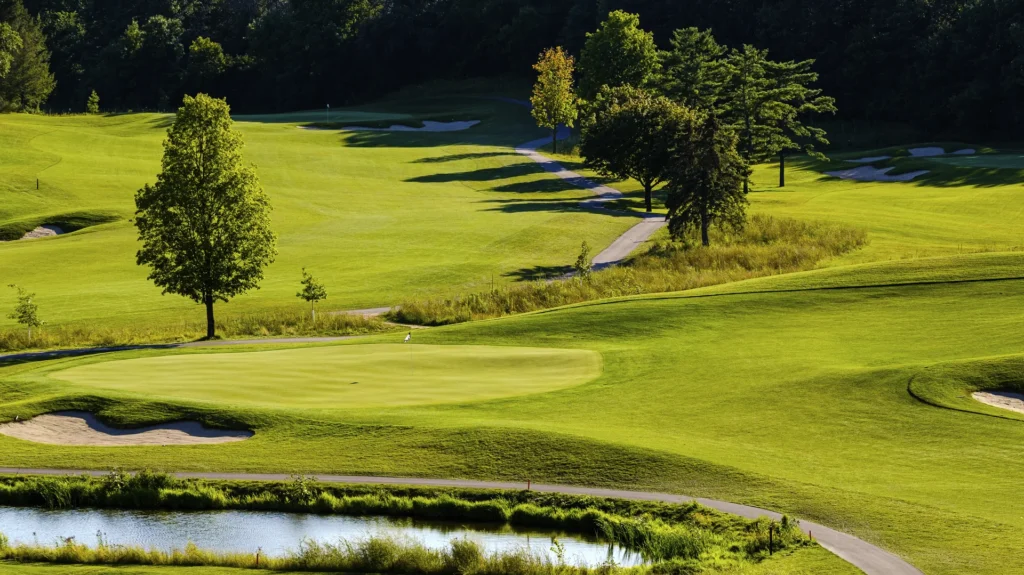
The views of surrounding holes four, five, six, 14 and 15 are worth the trip as is the distant Minnesota landscape. From a design standpoint, the three-club difference from back tee to green tempers the long climb. The putting surface is broken into five separate pin placements set almost in a pinwheel fashion around the center point, some of which are separated by ridges and others by swales.
Yardages
| Tee | Yardage |
|---|---|
| Championship | 204 |
| E | 189 |
| D | 178 |
| I | 151 |
| N | 144 |
| A | 133 |
Playing Tip
Demanding on walkers, yes, but the view is too good to pass up. Rarely does such elevation change (more than 80 feet downhill) present itself on a site that isn’t found in the mountains. Yet as such a dramatic view of the Twin Cities as this hole affords, the green still presents a challenge in the form of a series of high points scattered randomly from back to front and side to side. Three sand bunkers frame both sides of the green. A short tee shot must be followed up with a recovery shot played over a mound/ridge complex onto the putting surface.
Hole 14
Par 4 | 295–448 yards
Yardages
| Tee | Yardage |
|---|---|
| Championship | 448 |
| E | 421 |
| D | 394 |
| I | 340 |
| N | 327 |
| A | 295 |
Playing Tip
The farther one cuts the corner, the more penal each bunker in the ridge becomes. But the reward not only is a shorter approach, but a visible shot as well, with a clearer path to the putting surface the more you bite off. Another reason to take the shorter route is that the putting green is much more receptive to an approach from that side. The only drawback to playing to that side is a large hollow waiting to swallow up any short approaches and a swift fall-off back-right.
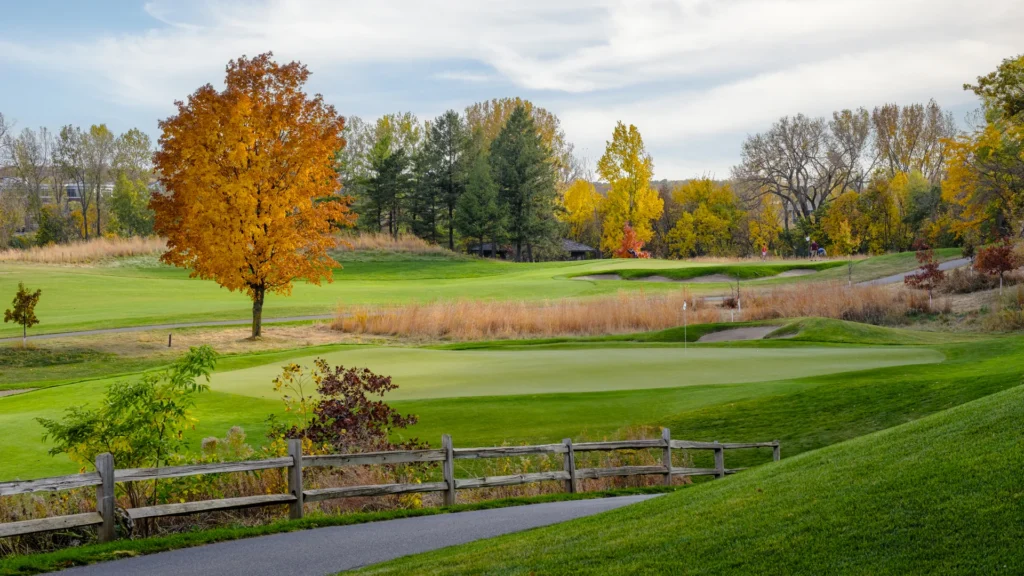
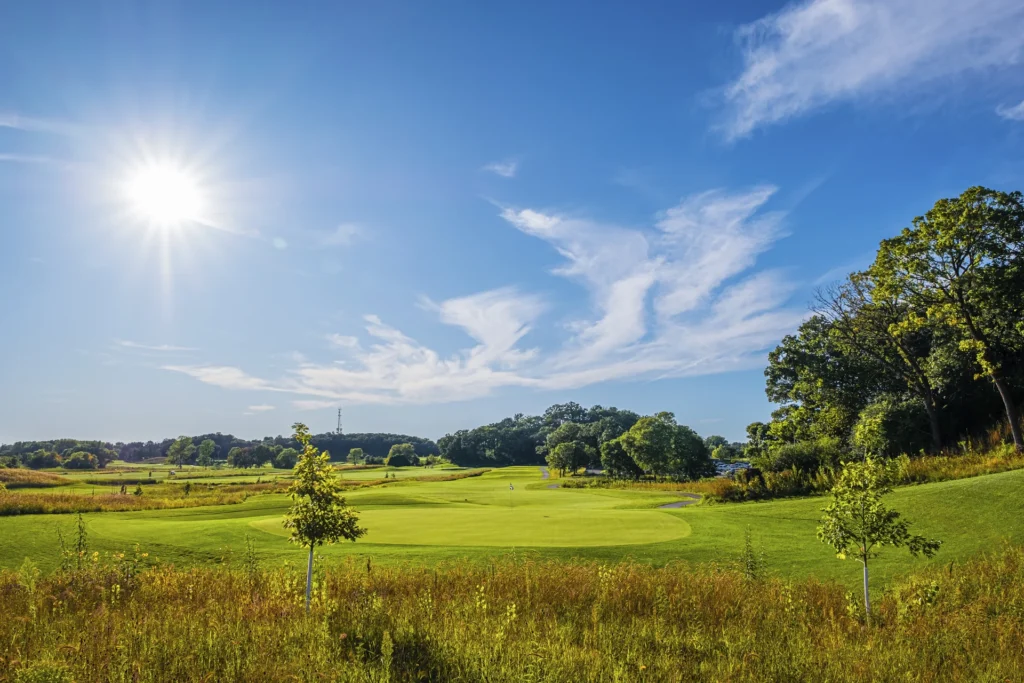
Hole 15
Par 4 | 272–421 yards
This straight par 4 begins high on a perch with choices to be made as the golfer encounters a pair of fairway bunkers hugging the left side of the center line of the hole. With more landing area available to the right, the natural inclination is to play to that side. The drawback is the approach shot from that side will need to negotiate a bunker guarding the front right side of the putting surface.
The lowest part of the property is where the 15th hole sits. It was prone to flooding regularly so the main focus was to raise the fairway. Raising such a vast area in one broad stroke can easily go in two directions and both are usually bad. Either there is too much artificiality with humps and bumps and awkward mounding or a wholesale fill leading to awkward, steep slopes trying to tie into existing grade along the edges.
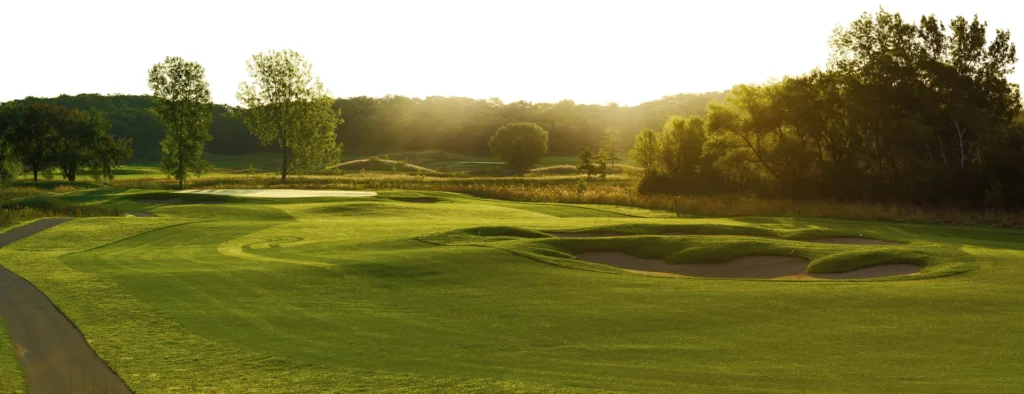
It is a plateau with subtle mounding in back and shallow bunkers front, left and right, best characterized as the front-right bunker, a “splash” bunker, as it is almost a pot bunker with flat sand, requiring a “splash” out of the sand. The green is large enough that it includes a few broad ridges that require putts from either side to rise and then gently fall on the other side.
Yardages
| Tee | Yardage |
|---|---|
| Championship | 421 |
| E | 396 |
| D | 373 |
| I | 362 |
| N | 318 |
| A | 272 |
Playing Tip
The play to the left off the tee is more of a gamble as tee shots spraying too far left may just find a small pond. But the hole opens up from that side of the fairway, making an approach a much more comfortable proposition.
Hole 16
Par 5 | 349–577 yards
The final par 5 is also the grandest in width, with its form a direct function of the infinite variety of options from tee to green. The hole is a seamless blend between the strategic and heroic schools of design. A lake hugs the entire left side of the fairway, eventually narrowing down to a creek crossing in front of an elevated green.
For those bold enough to go for the green in two, a tee shot as close to the water as possible is the play.
The strategic school is open for those who still want to take a shorter route but away from the pond, courtesy of a large mound complex that bisects the first landing area. Those taking the longer route to the right of the mounding will have a better angle along the breadth of the fairway for the next shot. The left route is more direct, but will necessitate an awkward line of flight going straight at a pair of fairway bunkers bisecting the second landing area into lower and upper fairways providing little depth from that angle.
Yardages
| Tee | Yardage |
|---|---|
| Championship | 577 |
| E | 557 |
| D | 494 |
| I | 478 |
| N | 402 |
| A | 349 |
Playing Tip
Playing an approach from the right side will have the best angle into a deep, rectangular green that has little room for error from left to right. The right side of the green extends out of a tall hillside. Any approaches leaking to the left may roll into the water 15 feet below. The green cascades down from back to a very accessible front, with a lone sand bunker cut into the right hillside.
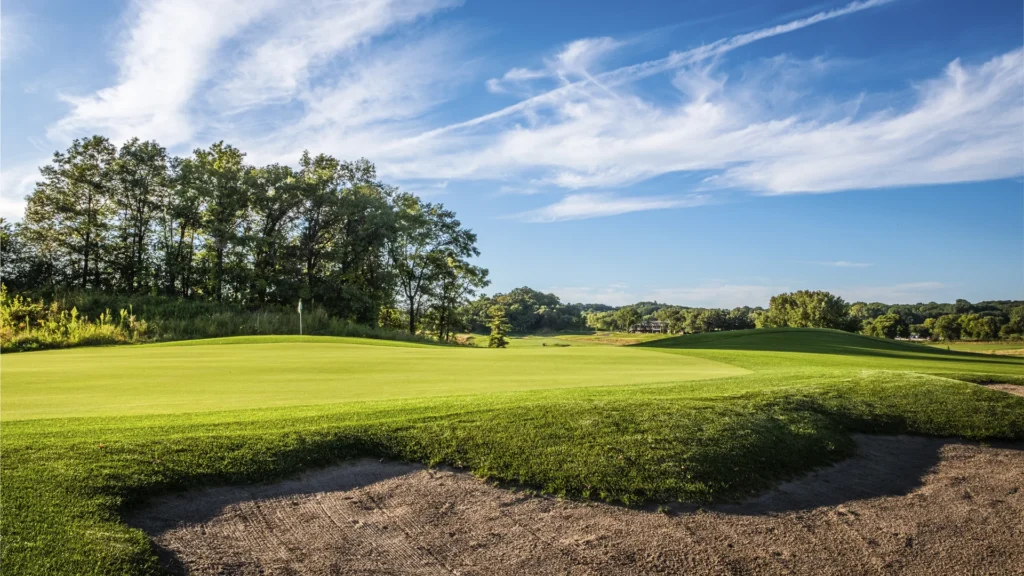
Hole 17
Par 3 | 96–190 yards
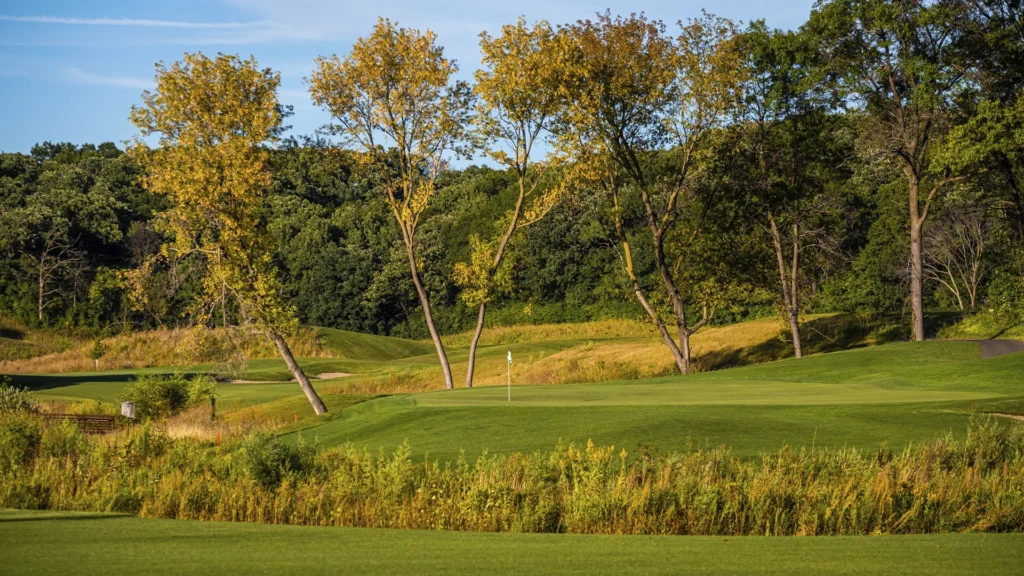
This downhill par 3 runs along a ridge line to a greens complex set on a ledge jutting out from the right side. A low-profile sand bunker fronts the right front side of the green and is visually balanced by a second bunker flanking the left side of the green. Mounds back left and back right serve as a backdrop to a putting surface that flashes hard up onto the ridge along the right. The green falls off sharply behind into an oak savanna.
The hole has a bit of a reverse redan look and feel to it with the bunkering, yet the dominant slope of the green plays more like the original redan from front right to back left. Nonetheless, the bunkers naturally fit into the front and side slopes of the green, creating a strong visual statement. Nor is there any sand wrapped around mounded peninsulas. Rather it is the placement of the central axis of each bunker and how each one cascades down from one side to the other along those axes.
Yardages
| Tee | Yardage |
|---|---|
| Championship | 190 |
| E | 150 |
| D | 135 |
| I | 125 |
| N | 106 |
| A | 96 |
Playing Tip
The bunker locations allow for accessible pin placements (front left) and much more challenging “Sunday” pin placements such as the front-right quadrant. When the pin is front right, the aggressive golfer must spin the ball back off a spine that runs out of the ridge running along the right to a very shallow target tucked hard behind the sand. Yet the less-inclined can run the ball up the opening between both bunkers. This bunker placement is a good example of providing strategic options for low or high handicap golfers.
Hole 18
Par 4 | 142–422 yards
This is a hole where existing ponds worked favorably to drop a dramatic heroic finale. The shape and orientation of the pond between tee and fairway afforded the opportunity to develop a risk-reward left-to-right tee shot.
Following up on the parallel relationship to the 12th hole, the best tee shot here is to the right, directing the golfer away from 12 (the best tee shot on that hole is to the left).
Similar to 12, visibility becomes a problem depending on which side of the fairway one plays toward and how the large ridge separating the fairways affects the approach. Whereas the tee shot on 12 discourages the shorter route from the right, playing away from that same ridge demands a more aggressive play toward the right on 18.
Yardages
| Tee | Yardage |
|---|---|
| Championship | 422 |
| E | 359 |
| D | 348 |
| I | 311 |
| N | 280 |
| A | 142 |
Playing Tip
An even match coming down to 18 will most likely end in victory for those who take the more aggressive route off the tee. That direction requires a drive over a fairway bunker in the corner of the dogleg and a pond flanking that side as well. The benefits are great with a tremendous distance advantage over the more conservative approach to the left. Although a shorter approach will be the reward, that shot must then carry a green-side bunker protecting a front right pin placement.
Ready to Play?
Championship 18 is open to the public. Book your tee time today.